Getting Started
The general usecase of GlobalMessage is to communicate gameplay events between atl east two gameplay systems without coupling them in a limiting way (i.e. not on the code- or prefab-/scene-level).
The way to achieve this is as follows:
- Create a new MessageType.
- Set up logic for receiving this MessageType in the second system.
- Set up logic for sending this MessageType in the first system.
If you learn best by getting your hands dirty in an already set up Unity scene, have a look at the Samples section.
We will continue to set up a basic message-sender-receiver-relation with a component-based workflow.
Note
GlobalMessage also supports other workflows that may suit you or your project better (i.e. code-focused, exposing references in custom scripts), so make sure to read up on the more detailed sections of the manual.
✉️ Creating a new MessageType
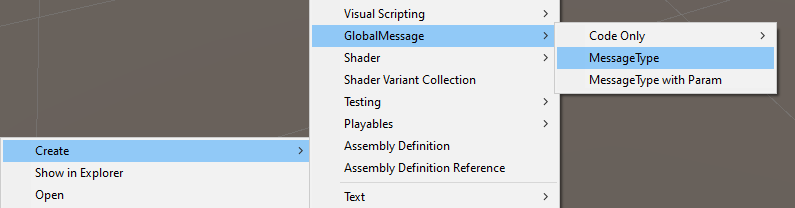
Right click inside the project view and navigate to Create > GlobalMessage > MessageType. Name the file MyNewMessage
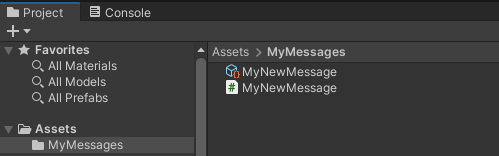
This will create
- a new MessageType in form of a script file
- an Editor Message Object (EMO) in form of a ScriptableObject (after automatic recompile)
The MessageType can be used in code while the EMO can be used in the Editor to reference the MessageType via UI.
📥 Receiving a Message
- Start by creating a new C# script with the name
LogOnReceive:
using UnityEngine;

public class LogOnReceive : MonoBehaviour
{
    public void MyReceiveMethod()
    {
        Debug.Log("Message received!");
    }
}
- Create a new game object in your current scene. Name it
Receiver Game Object - Add the
LogOnReceivecomponent to theReceiver Game Object - Add GlobalMessage's
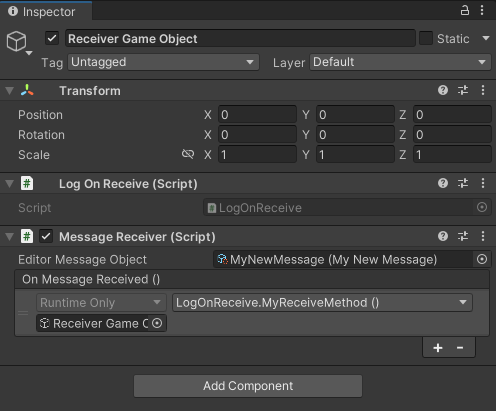
MessageReceivercomponent to the game object
4.1. SelectMyNewMessageas the Editor Message Object
4.2. SelectLogOnReceive's methodMyReceiveMethodas a Receiver
Receiver Game Object should now look like this:
🐞 Testing Message Reception
GlobalMessage offers comfortable tools for testing, debugging and keeping a an overview on the message structure of you project.
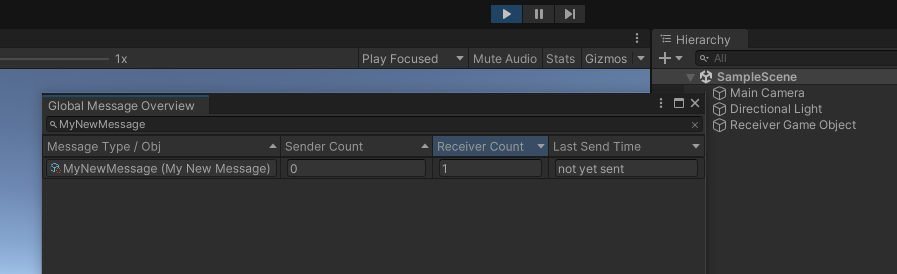
First we want to check if our GameObject registers itself correctly as a Receiver for MyNewMessage.
- Open the
Overview WindowunderWindow > GlobalMessageand search forMyNewMessage. - Start the scene. The
Receiver Countshould go up to one.
- To find out who this Receiver is, double click the entry and the
Info Windowwill appear. - Navigate to the
Receivers Tab. It shows theReceiver GameObjectas a current Receiver.

Important
GlobalMessage only displays the current Receivers. As most gameplay logic (i.e. the MessageReceiver component) only operates during Play Mode you have to start the scene before the info can be displayed.
Now that we are certain Receiver registration is working correctly, we can go on to test if the Message is correctly processed by our Receiver. If everything works correctly, LogOnReceive component should print Message received! to the console.
We can verify this very easily by triggering the message form the editor directly.
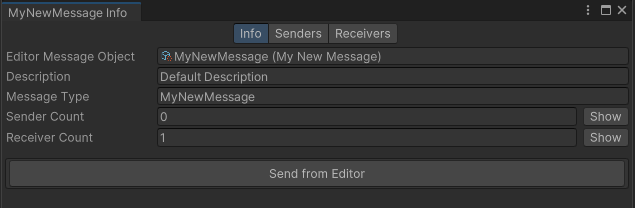
- While still in Play Mode, select the
Info Tabin theInfo Window. - Click on the
Send from Editorbutton. - The log should appear in the console.
Great! Now let's continue with sending Messages.
📤 Sending a Message
- Create a new C# Script with the name
SendOnRepeat:
using System.Collections;
using UnityEngine;
using UnityEngine.Events;

public class SendOnRepeat : MonoBehaviour
{
    public UnityEvent OnRepeat = new UnityEvent();

    // Starts the loop
    private void OnEnable()
    {
        StartCoroutine(RepeatCoroutine());
    }

    // Triggers the "OnRepeat" event every 2 seconds while game object is active
    private IEnumerator RepeatCoroutine()
    {
        while (true)
        {
            yield return new WaitForSeconds(2.0f);
            OnRepeat?.Invoke();
        }
    }
}
- Create a new GameObject in your current scene. Name it
Sender Game Object. - Add GlobalMessage's
MessageSendercomponent to the GameObject
3.1. SelectMyNewMessageas the Editor Message Object - Add the
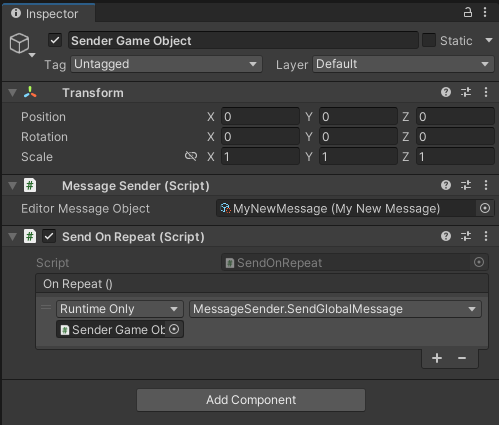
SendOnRepeatcomponent to theSender Game Object
4.1. AddMessageSender's methodSendGlobalMessageto the On Repeat event
Sender Game Object should now look like this:
🐞 Testing Message Senders
Testing the Sender logic with our current setup is very easy: start the scene and the Sender should cause LogOnReceive to log Message Received! to the console every two seconds.
Of course, GlobalMessage also offers more detailed tools to debug Senders.
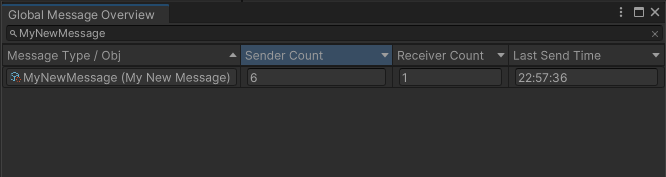
- While the scene is still playing, open the
Overview Windowagain. (Window > GlobalMessageand search forMyNewMessage) - You should see the
Sender Countincrease every two seconds.
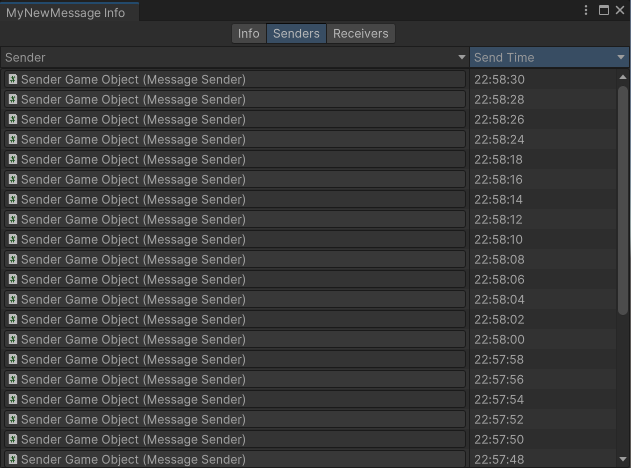
- Double click the entry to open the
Info Window. (Alternatively you can also open it by selecting the EMO in the Project View and clicking theShow full Info Viewin its Inspector View) - Select the
Senders Tabto see more info about each Sender (which is alwaysSender Game Objectin our case).
🎉 Congratulations
Great, you have just mastered the basics of GlobalMessage. If you want to learn more, head over to the Samples section, browse the Manual on your own, or start creating a project using GlobalMessage right away.